
The term ‘Klimt cane’ is used because the patterns made look very similar to the style of the artist Gustav Klimt.
You will need:
- Between 5 and 8 colours of polymer clay. I used 5 for this project.
- A tissue blade
- Clay extruder with square disc
- Rolling pin
- Small circular cutter (not essential depending on method used)
- Cutter shapes, like a dolphin (not essential)
So first of all, condition your polymer clay (I use Fimo). It needs to be pretty soft to that you can extrude it easily. Then roll out sheets in your chosen colours, about 2mm thick:

(Instead of rolling out flat sheets, you can also roll each colour into a sausage and cut slices off the ends to create the circles, but I find they go a bit squishy.)
Then, using a circular cutter, cut out circles, about 10 of each colour. Exactly how many you need depends on how many colours you’re using and the thickness of your sheets.
 Next, make a stack of circles, varying the colours:
Roll this lightly to stick the circles together a little better:

Load the stack into a clay extruder. I use Makin’s green one! And fit the square disc onto the end. Then extrude:

Once your clay is all out, cut it in half with a tissue blade and put the two halves next to each other like so:

These should be the same size. Not sure why they look so different in this picture!
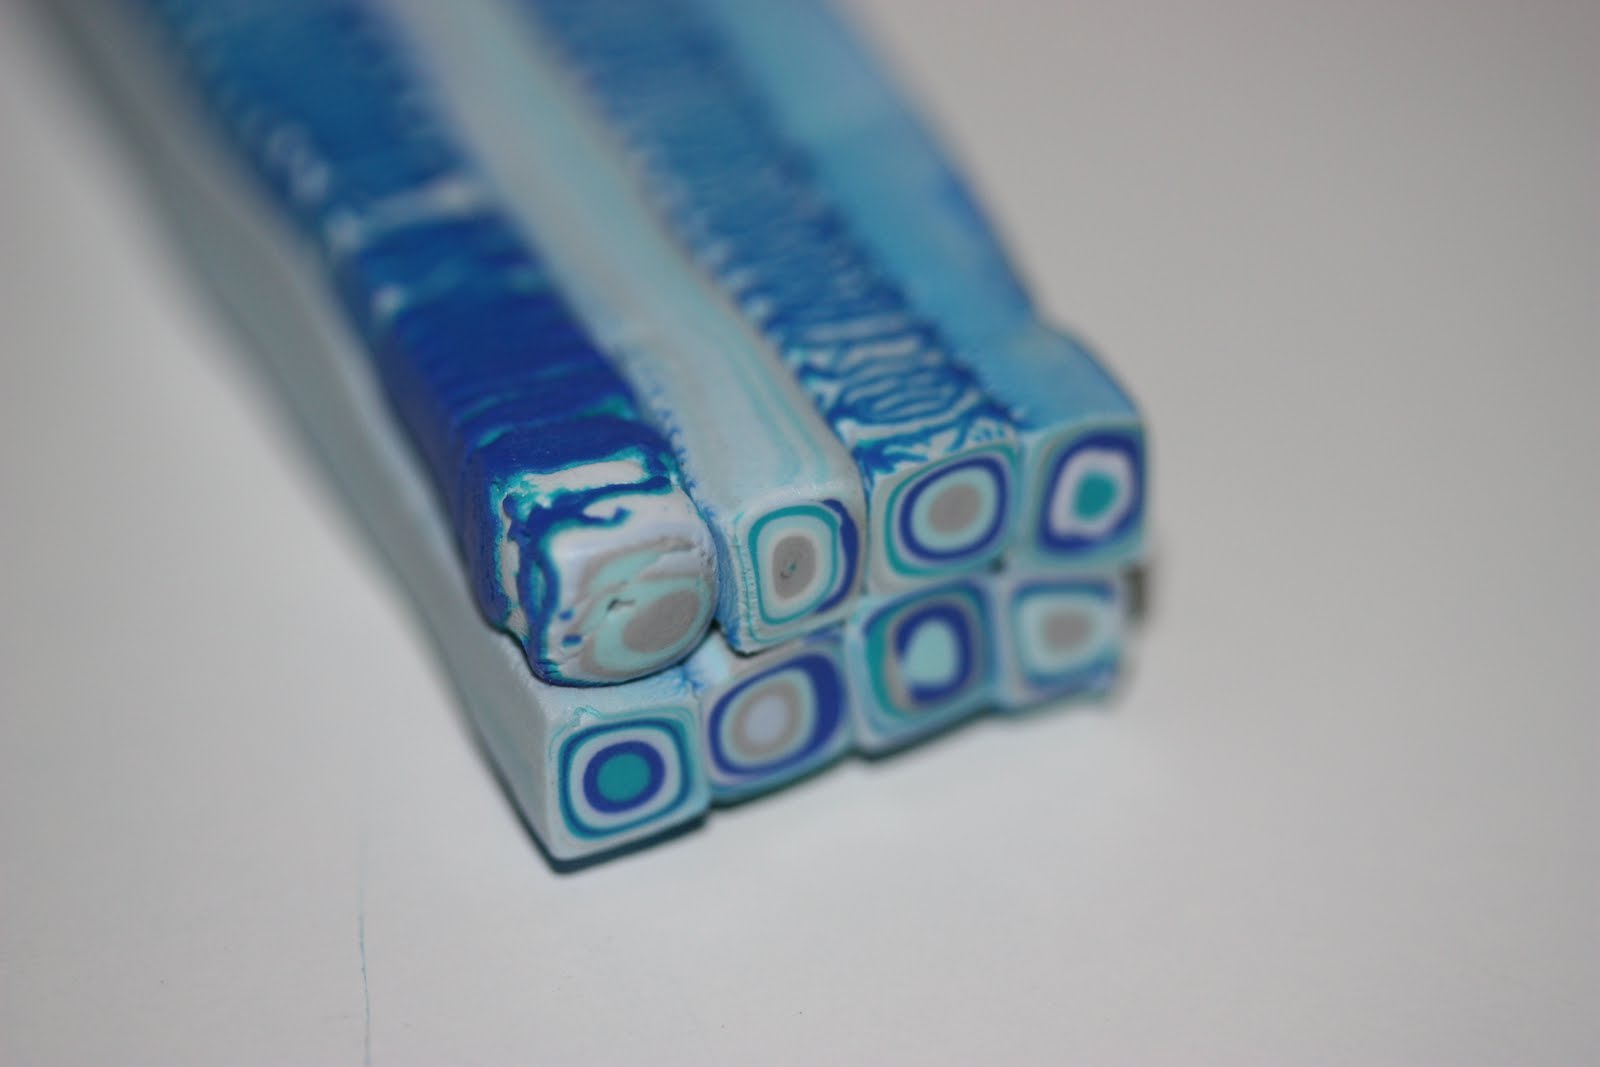
Cut in half again and put together:

Do this a few times until you have a size you’re happy with:

Make sure you check both ends when you cut and put together, as each end will probably have a different pattern. Choose what you think looks best.
Smooth the sides of the cane by lightly going over the edges with your rolling pin. Be careful not to distort the pattern though.
You can stop here if you wish, as your cane is finished. Cut thin slices and cover scrap clay to make pretty much anything! Pendants, earrings, charms, magnets... whatever your imagination comes up with!
To make the dolphin, roll out a sheet of blue clay and lay slices of the cane on top:

Once you have covered enough of the blue clay, lightly go over with a rolling pin to smooth any bumps.
Then, taking a dolphin cutter (or whatever shape you like), press into the clay:
 Voila! I think I’ll make this into a hanging decoration with some blue ribbon. I'll list this on Folksy soon, but if you'd like to buy it now, please send me an e-mail: victoria@carefordcreations.co.uk

Do this a few times until you have a size you’re happy with:
Make sure you check both ends when you cut and put together, as each end will probably have a different pattern. Choose what you think looks best.
Smooth the sides of the cane by lightly going over the edges with your rolling pin. Be careful not to distort the pattern though.
You can stop here if you wish, as your cane is finished. Cut thin slices and cover scrap clay to make pretty much anything! Pendants, earrings, charms, magnets... whatever your imagination comes up with!
To make the dolphin, roll out a sheet of blue clay and lay slices of the cane on top:

Once you have covered enough of the blue clay, lightly go over with a rolling pin to smooth any bumps.
Then, taking a dolphin cutter (or whatever shape you like), press into the clay:
 Voila! I think I’ll make this into a hanging decoration with some blue ribbon. I'll list this on Folksy soon, but if you'd like to buy it now, please send me an e-mail: victoria@carefordcreations.co.uk


it looks gorgeous, well done.
ReplyDeletejoy xx
That is brilliant, you are very talented!!
ReplyDeleteThat's lovely, I love your colour combination. I love making Klimt canes, they are my favourite pc thing along with kaleidoscopes
ReplyDeleteThanks all:)
ReplyDeleteAverilpam - yeah, they're a lot of fun aren't they?! I like kaleidoscopes too. There's just always so much going round in my mind - colours, patterns and so on!