Home of The Small Art Company and a bit of British all sorts about my family, kids, home, art, mixed media, craft, photography, illustration, travel, cooking, organisation, teaching... Good to see you:)
Showing posts with label Fimo. Show all posts

Friday, December 30, 2011

Christmas at Home...

Hope you all had a lovely Christmas. Thought I'd just share some photos with you. These are some of our handmade decorations and foodie things from this year and past years...

Sorry they're all in a long column, I haven't worked out how to 'tableise' things yet!


I wish you all a very happy and peaceful New Year. See you soon with some new projects!

Sunday, October 9, 2011

Handbound Books... and New Business Direction

I love, love, love books! I love really old books with their dusty covers and falling apart pages, threads hanging from the spines... And I love brand new books with their crisp clean pages and that lovely new book smell! I love reading books, I love writing in cute notebooks, I love listing in them, creating in them. And I love to make books too.

I've had a long think about the direction my creative business is going. I've never been able to stick to one thing as I have several crafty passions and can't just not make! The problem I have is that my shops have always seemed a bit of a mish-mash. I thought that it could be a good thing - a bit like a handmade department store, never knowing what you might find. However, I'm not sure this really works when selling online.


So, I think I've found how to combine all my crafty things while keeping a cohesive look to my shops. I'm going to concentrate on handbound books. The books I made before were either just tied with ribbon (polymer clay books) or used Japanese stab-stitch. I've decided to have a go with Coptic stitching. Each book will have a polymer clay button and most will have an altered photograph or an original illustration.


I've mentioned altered photographs as that's how I'm going to be selling my images from now on. After some research (and a few years trying!), I've realised that standard photographs generally don't sell that well. People are looking for something different and unique. I've been learning lots of techniques on altering images and that's how I'm going to be selling them from now on - on books, as greeting cards and ACEOs.


Phew - sorry for the long rambling, but I think I needed to get it all down on 'paper' to make things clear in my head!

So - pics are my first Coptic-stitched listing on Folksy, planning for the next few books and some of my altered images I'm working on.

Anyone else out there love books?? I'm sure there are a few of you... Or is your business heading in a new direction?

Saturday, October 8, 2011

My Workspace!

Seeing as the Folksy folk are asking to see people's workspaces, I thought I would post mine here. I would dearly love a whole room just for me and my crafty bits, but I'll have to make do with a corner of the living room:


Here you can see on the top shelf paints, paintbrushes, Fimo, polymer clay tools, cutters etc., paper trimmer, lightbox, cutting mat, sketchpads, tissues and a baby monitor! Second shelf has a spotty bag full of bits like charms, keyrings, an awl, cutters, a rug hook, jewellery tools, organza bags... another box with jewellery findings and threads, my old Kodak Duaflex camera, pasta machine, Fimo canes, pencils and a mini tripod. Oh and my son's sponsored fill-a-pot pot for Nursery! On the desk are a load of folders, books, my children's illustration course, my latest bookbinding project and there's a computer under there somewhere.


Underneath is more Fimo, fabric, raffia, ribbon, threads, camera stuff and a bin! On the wall you can a French memo board I made which has a few ACEOs including one made by Wellydog as part of a swap we did. There's altered images of some of my flower photos as well. You can also see a few other bits from Folksy sellers like Hidden Eloise and Asking for Trouble. My art portfolio and work board are in this pic too. I use one side for polymer clay and the other for painting!

And a little bit of the conservatory:


These canvas boxes have loads of different papers and board for my books. And another of my memo boards too. This one's for my son's room.

Actually, I also have an upstairs cupboard full of stock, craft fair display bits and other odds and ends I don't use very often. And then there's the shoe cupboard in the hallway that has all my envelopes and bubble wrap, erm, which is also on top of the fridge... I seem to have taken over the house!

So... that's my space. I always thought I was a tidy, organised person. While I do love labelling and organising, I can't seem to keep it tidy!

Tuesday, July 20, 2010

How to make a polymer clay Klimt cane dolphin

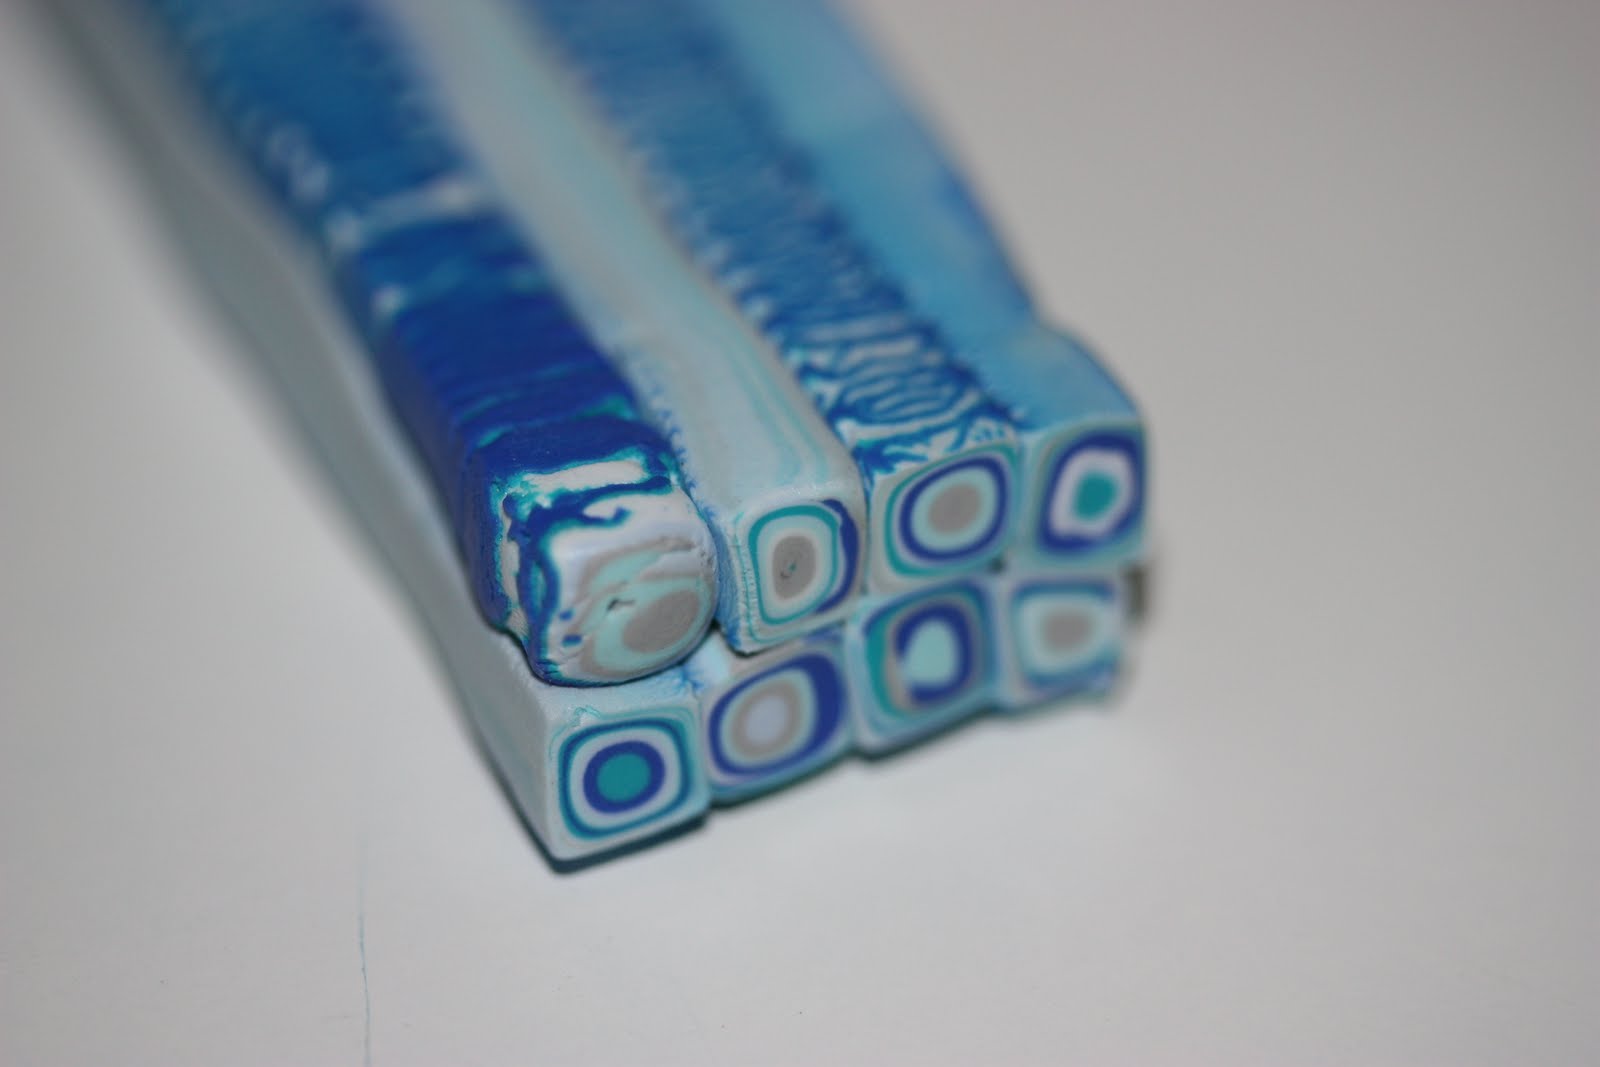
So... this is how to make a polymer clay Klimt cane dolphin. Now, that’s a bit of a mouthful isn’t it?! This process of course, can be used to make anything out of a Klimt cane, not just a dolphin. I’ve followed the instructions of a few different people and combined them based on what works best for me.

The term ‘Klimt cane’ is used because the patterns made look very similar to the style of the artist Gustav Klimt.

You will need:
  • Between 5 and 8 colours of polymer clay. I used 5 for this project.
  • A tissue blade
  • Clay extruder with square disc
  • Rolling pin
  • Small circular cutter (not essential depending on method used)
  • Cutter shapes, like a dolphin (not essential)

So first of all, condition your polymer clay (I use Fimo). It needs to be pretty soft to that you can extrude it easily. Then roll out sheets in your chosen colours, about 2mm thick:


(Instead of rolling out flat sheets, you can also roll each colour into a sausage and cut slices off the ends to create the circles, but I find they go a bit squishy.)

Then, using a circular cutter, cut out circles, about 10 of each colour. Exactly how many you need depends on how many colours you’re using and the thickness of your sheets.

Next, make a stack of circles, varying the colours:


Roll this lightly to stick the circles together a little better:


Load the stack into a clay extruder. I use Makin’s green one! And fit the square disc onto the end. Then extrude:


Once your clay is all out, cut it in half with a tissue blade and put the two halves next to each other like so:


These should be the same size. Not sure why they look so different in this picture!
Cut in half again and put together:


Do this a few times until you have a size you’re happy with:


Make sure you check both ends when you cut and put together, as each end will probably have a different pattern. Choose what you think looks best.

Smooth the sides of the cane by lightly going over the edges with your rolling pin. Be careful not to distort the pattern though.

You can stop here if you wish, as your cane is finished. Cut thin slices and cover scrap clay to make pretty much anything! Pendants, earrings, charms, magnets... whatever your imagination comes up with!

To make the dolphin, roll out a sheet of blue clay and lay slices of the cane on top:


Once you have covered enough of the blue clay, lightly go over with a rolling pin to smooth any bumps.

Then, taking a dolphin cutter (or whatever shape you like), press into the clay:

Voila! I think I’ll make this into a hanging decoration with some blue ribbon. I'll list this on Folksy soon, but if you'd like to buy it now, please send me an e-mail: victoria@carefordcreations.co.uk


Here’s something else I made with another Klimt cane: Retro ‘70s magnets!
Hope you find this tutorial useful. I’d love to hear what you make!


Tuesday, June 22, 2010

Back to the Fimo and other new creations

I ordered some bag charms today and am looking forward to playing with the Fimo again to make something a little different. I don't know why everything always takes me so long, but I've had plans to make these charms for... a year maybe?! I designed them and everything and then, well, maybe it was just toddlers and babies and little things like that keeping me occupied...

Here are some pics of phone charms and bookmarks that I may also make into bag charms:


I'm also starting to sell my photos in sets, as I have a feeling that grouping images on your wall is the 'in' thing at the moment. I've listed two sets on Folksy:


I'm also in the middle of drawing/glass painting some new animal images which I'll probably sell as a group of 4. If they work out I think they'll look great on a kid's bedroom wall or nursery.
Anyway, I'm off to enjoy the sunshine...


Friday, February 12, 2010

Valentine's Heart Swap

I recently took part in another Folksy swap, organised by Lisa of NoodleBubble. This time we were swapping hearts! I made this for Jacky of Jacksknits:
It's made from Fimo - pink underneath with slices of a white and translucent cane on top. And received this from Amy Macpherson of Macpherson's Miscellany:


How lucky to receive three gorgeous items - a brooch, a card and a bracelet! Thanks Amy! And thanks Lisa for organising another great swap.

Wednesday, December 2, 2009

Some Christmas Decorations

I've been pretty pleased with these Fimo decorations I made. I was going to list them on Folksy, but I think it may be a little too late, so if you'd like to buy any of these, just send me an e-mail: victoria@carefordcreations.co.uk and I'll add them to my website for you.

These three are magnets:


A robin (can you tell I'm worried you may not be able to recognise what they are?!):


An angel:


And these cute snowmen faces are magnets too:

If you're interested in buying them, the magnets are £4 each including p&p and the decorations are £5 each including p&p.
I won't post pictures of the ones I made for the Folksy swap until the recipients have received them, which will hopefully be today...


Monday, November 30, 2009

Advent Tree Calendar

Yippee! It's that wonderful time of year again - Christmas! Once the 1st December arrives, I feel I can officially talk about the festive season, so here we go.

I made this Advent calendar last year for my son:


As you can no doubt see, it's made from glittery green felt, some burnt orange fabric, some tartan ribbon, deep red felt, white felt for the numbers, bits of sparkly gold thread and some white buttons.
I'm certainly no sewing expert and have to say, I was quite pleased with the finished result. The decorations are made from Fimo. You can just see Father Christmas hanging at the bottom. I'll do another post when the tree's fully decorated in a few weeks!

Tuesday, November 24, 2009

At last - my website!

Yes, it's taken 5 and a half years since buying the domain name and about a year and a half since actually doing anything with it, but I've finally got a proper website up and running.

You can view all my photos here (well, quite a few of them) plus some other photographic gifts.

I've also been busy with the Fimo and made a load of Christmas decorations. I'll be taking them to the Winter Wonderland Shopping Fair at Hylands House in Chelmsford on Sunday and any I don't sell I'll be listing on Folksy and my website.

Anyway, off for a second baby scan in a mo...

Friday, October 9, 2009

Christmas House

OK, here it is...


This is my Christmas Fimo house! It's far from perfect, but it's the biggest thing I've made out of Fimo. It was quite tricky to keep it all upright. I think I should have baked the main structure first and then added the roof and windows.

The Christmas tree has lights that glow in the dark, so hopefully it should all look very festive when the time comes.

I'm not using my macro lens to photograph the house as it will show every imperfection!!

So now on to some Fimo decorations and those magnets...

Tuesday, July 7, 2009

Fun in the Park

It was Chico time on Sunday, when Fun in the Park got underway in aid of Fight for Sight. There were live bands, sports events, food and crafts and of course, Chico!

As for me, well, I was selling photos and for the first time, some polymer clay creations. I'm delighted to say that I made a profit! I also had lots of really lovely comments about my photos, which I was obviously rather pleased about. It makes it all worthwhile after all your efforts, when someone says something nice!

Here's my mum helping to arrange the stall. It had a few adjustments after this mind you. The cards were put further back and the bookmarks and mobile phone charms brought forward.


The weather was perfect in temperature terms, but as we were by the side of the lake and had no shelter, it was, let's say, rather windy. The stall next to us packed up and left early when her gazebo nearly took off and my mum and I were constantly taping things down and blu-tacking and holding on to anything loose! It didn't stop the twirly display thingy blowing over at one point though. Luckily, I came prepared with some extra pegs and some string and managed to secure it.

All in all, we had a good day. Hope to get a little bit of my life back now. It's amazing how much preparation exhibiting takes.

Saturday, June 6, 2009

It's Play Time!

Yesterday I had lots of fun with Fimo! It's been months since I've managed to do anything with it and I realised how much I'd missed playing with the stuff! Look at all these lovely colours waiting to be mixed...


I've got so many ideas of things to make but just need the time to make them, especially as I've just booked a stall at Fun in the Park in Stanborough Lakes, with special guest Chico no less! It's on July 5th so I'd better get a move on.
Here are a few of my Fimo creations anyway...


I think I'm most pleased with the decorations I made for my son's Advent tree last year, but I won't post those in June. Thinking... no, I can't, honestly, it wouldn't be right.